

Before you begin
You need:- A Google Cloud project, or permission to create one.
- A Google Workspace Super Admin, or a delegated admin who can edit API controls, to grant domain-wide delegation in the Google Admin console.
- A Workspace user to act as the primary admin. Onyx impersonates this user for setup calls and to list the Workspace’s users, so it needs the admin privileges in Choose the primary admin.
Configure Google Cloud
1
Create or pick a project
In the Google Cloud console, create a project,
or select an existing one. The project only holds the service account; it does not need billing.
2
3
Create the service account
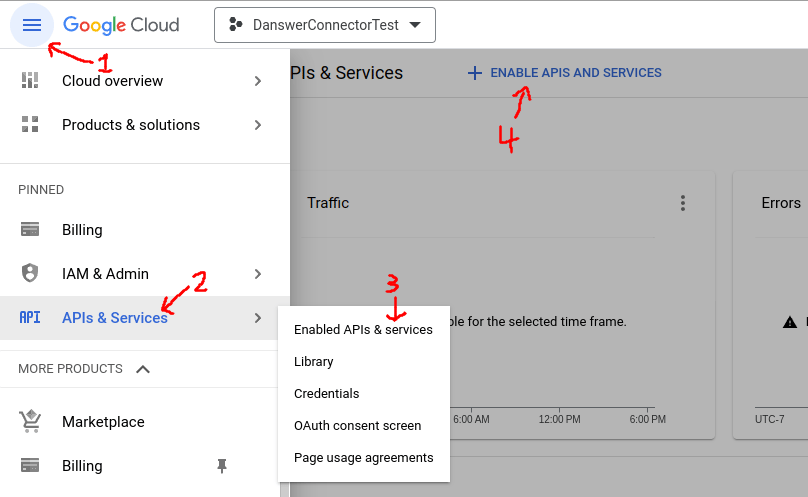
Open IAM & Admin → Service Accounts
and select Create service account. Give it a name such as
onyx-drive-connector and select Done.
The optional role and access steps can stay empty; the service account needs no project roles.4
Create a JSON key
Select the new service account, open the Keys tab, and select Add key → Create new key.
Choose JSON and select Create. Google downloads the key file. Keep it safe; you upload it to Onyx later.
Organizations created since May 2024 block service account keys by default,
and Create new key fails with a policy error.
An organization policy administrator can allow keys for this project:
open Organization
Policies,
select the project, select Manage policy, choose Override parent’s policy,
set the rule to Not enforced, and select Set policy.
5
Copy the client ID
On the service account’s Details tab, copy the Unique ID, a long number.
Domain-wide delegation identifies the service account by this ID, not by its email address.
Grant domain-wide delegation
Sign in to the Google Admin console as a Super Admin.1
Open API controls
Go to Security → Access and data control → API controls,
then select Manage Domain Wide Delegation at the bottom.
The direct link opens the same page.
2
Add the service account
Select Add new. In Client ID, paste the service account’s Unique ID. In OAuth scopes,
paste all four scopes as one comma-separated line:Select Authorize. All four are read-only.
The two Admin SDK scopes let Onyx list the Workspace’s users and groups.
Choose the primary admin
Onyx impersonates one Workspace user, the primary admin, to list the Workspace’s users and shared drives and as a fallback for opening files. The user needs:- A Google Workspace license with Drive and Docs turned on.
- An admin role with these privileges, set under Account → Admin roles in the Google Admin console:
- Admin console privileges → Services → Drive and Docs → Settings
- Admin API privileges → Users → Read
- Admin API privileges → Groups → Read
- Admin API privileges → Organization Units → Read
onyx-robot@example.com.
Use a real Workspace user, not the service account’s own email address.
Onyx takes the Workspace domain from this address and indexes the users of that domain.
Create the credential in Onyx
1
Open the Google Drive connector
In Onyx, go to Admin Panel → Add Connector and select Google Drive, then select Create New.
2
Upload the key
Under Option 2: Service account, upload or paste the JSON key file.
Onyx rejects a file that is not a service account key.
3
Enter the primary admin
In Primary Admin Email,
enter the address of the user from Choose the primary admin.
Select Create Credential.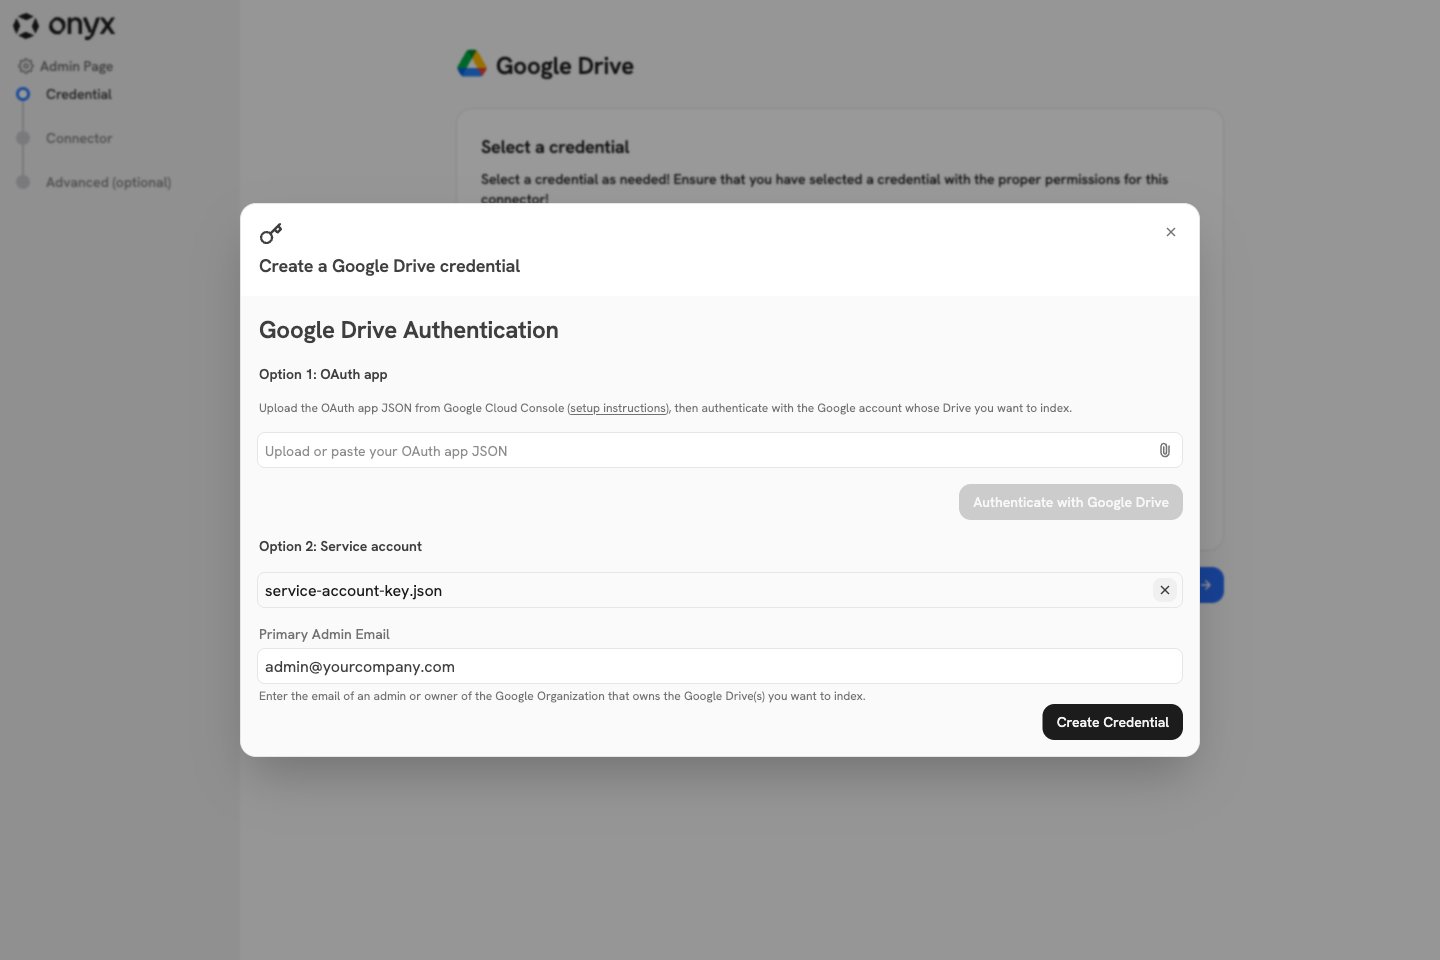
4
Continue to the connector
Close the dialog, select the new credential, and select Continue.
Then follow Configure the connector in
Onyx.